Integrating Formik’s FieldArray and Field components with Material UI components
- Apr 12, 2023
- 4 min read
Updated: Jun 4, 2023
I decided to revisit and revamp some of my full stack applications. I realized that I had two features that I never added to my Seize The Day app, so I'm quickly knocking them out. While implementing the Subtasks feature for the app, I had to do some digging about integrating Formik and Material UI components together. One specific challenge was integrating a Formik <FieldArray> and <Field> component with a Material UI <TextField> component, and there were multiple resources that I had to tie together to get the job done. So I decided to piece together this blog post in hopes that someone in the future only has to dig for this one resource!
TLDR: Formik's <Field> component accepts an "as" property, to which you can pass an entire other component for <Field> to be compiled as, and yet still have Formik's functionality.
Getting Started
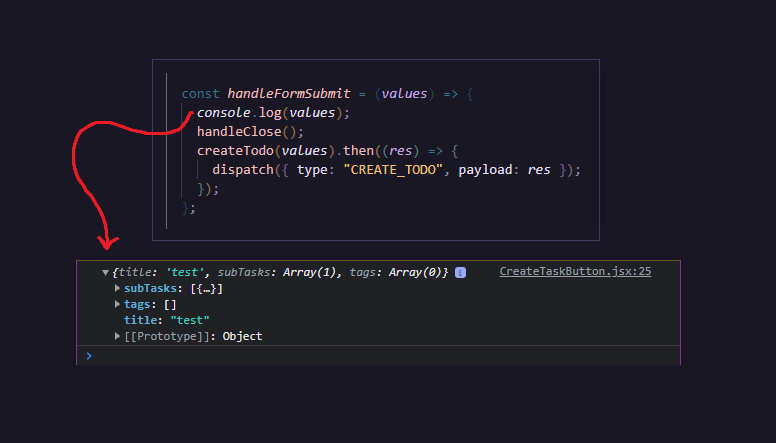
To preface, I have a <CreateTaskButton> component which is a button that when clicked, opens a modal to reveal a form. Before this feature, users could add a task to their “to-do” list by simply entering a “title” for their task. In the gif below, you can see that the “subtasks” and “tags” features are disabled. When the user is finished, clicking the “Create New Task” button in the bottom right corner of the entire modal submits the form. All of the values from the inputs are collected together and passed off to a createTodo function.

This new Subtasks feature allows users to have the option of adding "subtasks" to their new task. For example, a task's title could be "Grocery List" and the accompanying subtasks could be "Apple", "Orange", etc.

One of the challenges of building this feature was figuring out how to build the logic using the Formik library. For the original build of the app, I chose to utilize Formik because of its form control. Instead of writing your own form logic, such as “handleSubmit” for form submission and “handleChange” for form inputs, Formik handles a form’s functionality ~behind the scenes~.
Initial Setup for Formik
At form submission, Formik sends off values which is an object that holds the form’s input values.
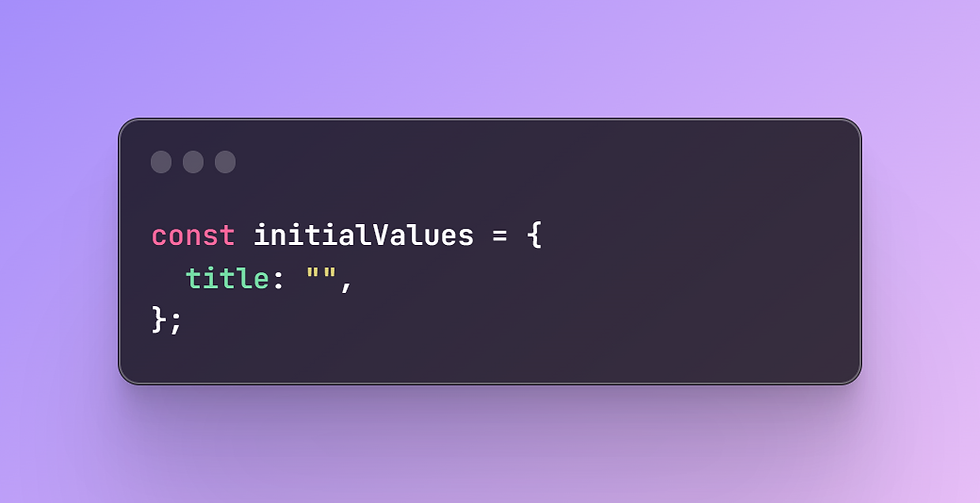
Formik requires the shape of the form to be defined in the object initialValues. Originally, I told Formik to expect a “title” who’s value would be a string.
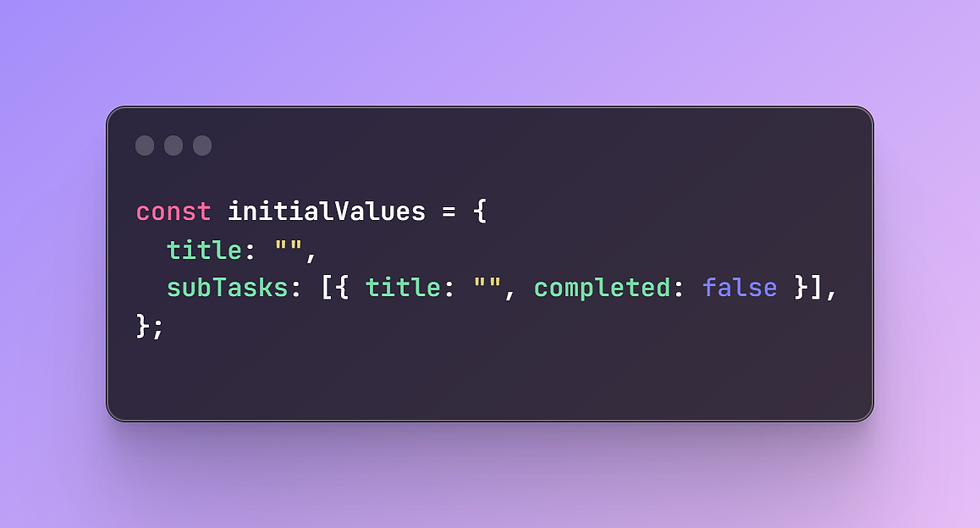
Now, I needed to tell Formik to expect subTasks whose value would be an array of objects, with each object representing a single subtask.
Building the input components for the form
For Formik to keep track of a string that is changing in an input, it’s as simple as including onChange={handleChange} and value={values.KEY_NAME} in a component. The name property's value should match the key in the values object. This tells Formik that as the input changes (onChange), to update the corresponding property in the values object (name) to be the new input's value (value). All of this magic happens for every keystroke in an input, so if a user were to type "App" in the input, Formik would be updating the values object each time for "A", "p", and "p".

For Formik to keep track of the “subTasks” array (as we defined in initialValues), this would need different logic than a simple string, as we saw in the example above.
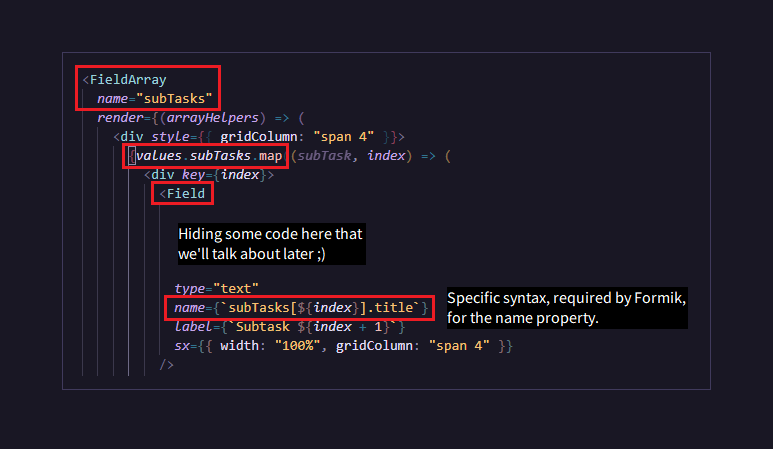
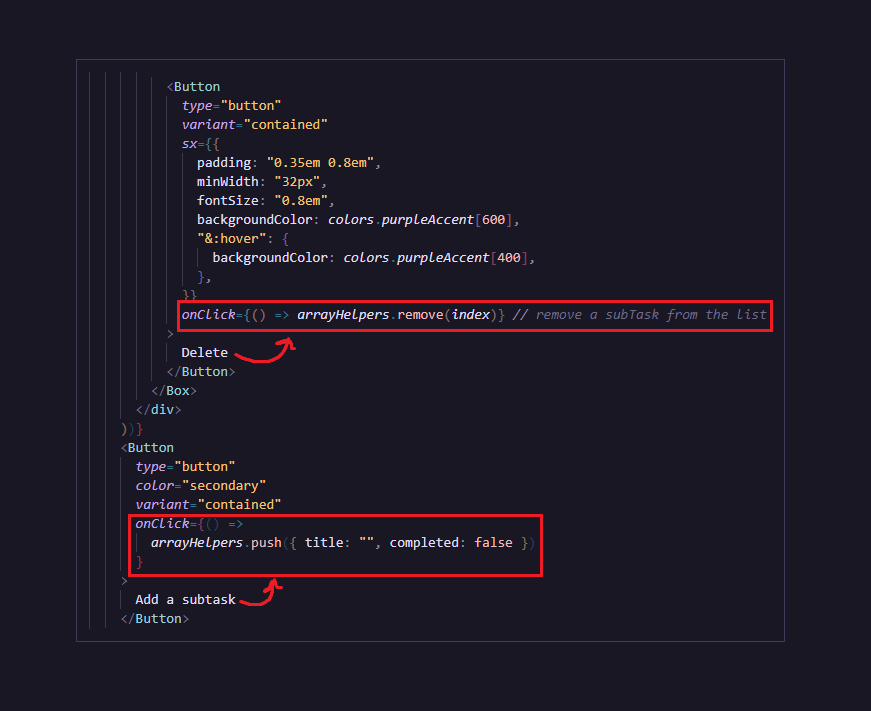
This video showed me that for tracking the values in an array, Formik requires the <FieldArray> component. Luckily, Formik documentation has boilerplate code for setting up a <FieldArray>. It's a large image, so I won't be sharing that here. However, I will explain how within the <FieldArray> component, the practice is to map through the array, which in my case is "subTasks", and render a <Field> component (input element) for each subtask.
So now, we're not just dealing with a simple string, we're updating an array of objects. Unlike a typical onChange={handleChange} situation, as explained earlier, the <Field> component requires specific syntax for Formik to be able to track changes of the input's value. For my specific values, the name property of the Field component had to be written as name={`subTasks[${index}].title`} where index is defined per component, because we are mapping through the array.
For updating the array's values (each subtask object), Formik has arrayHelpers, so all I had to do was create the buttons and give them an onClick property corresponding to their functionality. The “Delete” button has the arrayHelpers remove an entire subtask object from the array, and the “Add a subtask” button has the arrayHelpers push an entire new subtask object to the array, with default values of title: ”” and completed: false.
Great! So I implemented the <FieldArray> component with <Field> components being rendered for each "subtask". But this is what the code was rendering to the user interface:
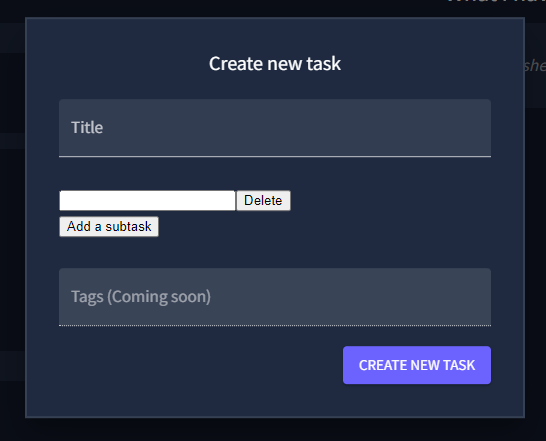
Yeah, let's be real. That's not cute.
Since the beginning of this app's development, I've styled my app using Material UI (MUI), a React component library. It's use is mostly simple: developers import components from MUI’s library and these components are pre-built, highly reusable, and pre-styled, providing consistency across the app. MUI's usage is noticeable in the image above: both the "Title" and "Tags" inputs are consistently styled.
We see what that looks like for the user interface, but what does that look like in the code?
For the "Title" and "Tags" inputs, I used <TextField> components from MUI. Before building out the Subtasks feature, I had already successfully integrated Formik's functionality with MUI's <TextField> component.

Where I struggled was getting Formik’s <Field> component to comply with MUI’s <TextField> styling. The other inputs in the form were using MUI’s TextField components, but this input must use Formik’s <Field> component for it to work properly with the <FieldArray> functionality.
After searching up “Formik FieldArray with MUI”, I found a codepen that gave me my answer.
Formik’s <Field> component accepts an “as” property, where we can tell the Field component to render as a particular component. So developers can pass “select”, “textarea”, or a whole component to the “as” property and that is how the Field would be compiled into HTML code. In my case, I passed it MUI’s TextField component, and was able to treat Field as an MUI TextField, passing it the stylistic properties I needed while still having the functionality of a Formik Field.

Lastly, all I had to do was create uniform styling for the buttons, and for the most part, the user interface stuff was ~done~. I was able to move on to updating the Context and API logic for creating a new task (now with subtasks!) and for updating the subtasks (toggling a subtasks' completion).


Comments